9 Snowman Crafts for a Cozy Winter Day Indoors
Even if the holiday season is over, January can still be filled with creative and exciting activities! Cold weather or not, it’s the perfect time to settle in for some winter crafts. And there’s no better mascot for the month than the humble snowman.
We’ll show you some of our favorite ideas in this list of snowman crafts. That way, so you can keep your spirits bright all the way through the winter season!
1. Cupcake Liner Snowman Crafts
This fun craft involves using cupcake liners to make a 3D snowman shape. It’s super simple, and you might even have plenty of cupcake liners leftover from all those Christmas treats!
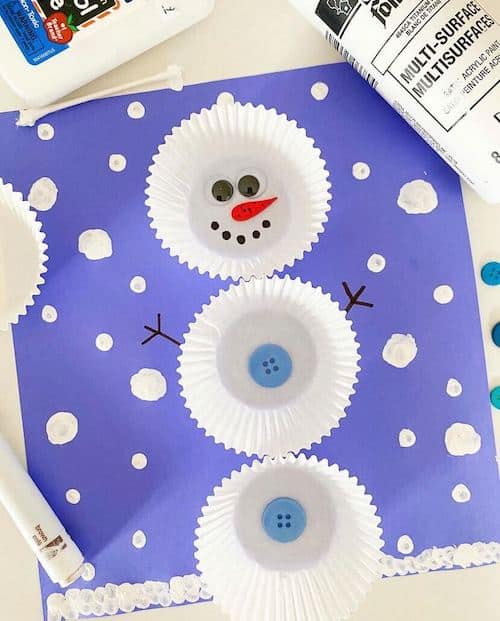
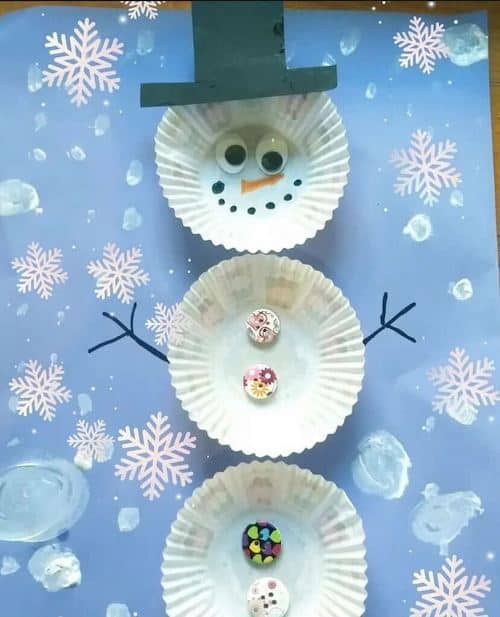
Glue 3 white cupcake liners in a straight line vertically onto a piece of blue construction paper. Then, decorate the snowman however you like! We recommend gluing googly eyes, drawing a face and arms with markers, and gluing buttons down the middle. You can even use washi tape for a scarf!
2. Snowman Sun-Catcher
When the winter months have fewer hours of sunshine, you’ll want to catch all you can! The good news–when the sun hits this adorable snowman craft, there’s no chance it’ll melt!
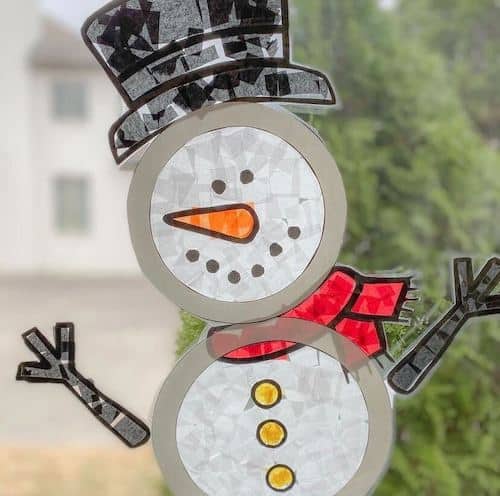
For this one, you may want to use a printable template to get the outline right. But you don’t have to. Start by cutting out two hollow circles in heavy white card stock. Cut out a piece of clear contact paper that is a bit larger than the snowman. Stick the card stock snowman outline onto the contact paper, small over large.
Cut around the snowman to remove the excess contact paper. Cut out the eyes, nose, and buttons from colored construction paper. Punch holes in a piece of construction paper to make small circles for the mouth. Place the eyes, nose, mouth, and buttons on the snowman. The sticky contact paper will hold them in place. Then, add squares of white tissue paper flat onto the contact paper to fill in any blank spots. Use construction paper to make additional accessories like a scarf, earmuffs, or bowtie to give the snowman some character. Then, flip the project over to glue them to the front of your snowman. Hang it in a bright window to see how the light filters through!
3. New-Sew Sock Snowman Craft
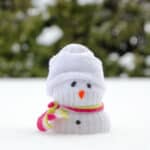
These adorable snowmen fix the dilemma of the sock-who-lost-its-partner, and we’re all about it.
No-Sew Sock Snowman
Materials
- 1 white sock
- 1 colored sock The photo shows white, but we like the idea of adding a pop of color
- 2 lbs dry rice
- 2 rubber bands
- 3 colorful buttons
- 1 ribbon
- 1 hot glue gun with hot glue sticks
- black and orange markers can also use orange pom-pom instead of orange marker
Instructions
- Fill your white sock with rice. You will need a hefty amount, but it's up to you how filled you want your snowman to be.
- Once you are happy with the size of your sock snowman, tie the top with the rubber band.
- Take another rubber band and place in the middle/upper section of the rice-filled sock to form the head shape.
- Glue the buttons to the bottom side by using a glue gun (glue dots work fairly well too). If buttons aren't your thing, you can also use rhinestones or beans.
- Draw the mouth and eyes with a black marker or with black paint.
- Add a ribbon for the scarf. A glue gun works best for ribbon. You can cut off excess white sock, but you can also wait to tuck it in with the next step.
- Cut the colored sock, discarding the heel and ankle section, you just need the mid-foot/toe section. Roll it a bit and place it on the head of your snowman. Leave it as it is, or you can secure it with some glue.
4. Bottle Cap Snowmen
Making fun snowman crafts from recycled materials is a great way to make activities into a learning experience. Talk about the ways you can reuse materials like empty glass jars, milk cartons, and plastic jugs. Are there any other fun ways you can do some winter decorating with what you already have? Check out our other winter craft ideas to find other cool ways to use recycled materials, like DIY snow globes!
Start by painting the inside of 3 bottle caps with white acrylic paint. You might need a few coats, letting it dry in between. Put a bit of hot glue (adults only) in between each bottle cap to attach them together vertically. Then, hot glue a ribbon loop to the top bottle cap for hanging.
Use a slim paintbrush or a toothpick to paint eyes, a nose, a mouth, and buttons on your snowmen. Once they’re dry, you can add some sparkle Mod Podge if you’d like. Tie a ribbon or yarn between the first and second bottle caps to make a scarf.
5. Snowman Wind Spiral
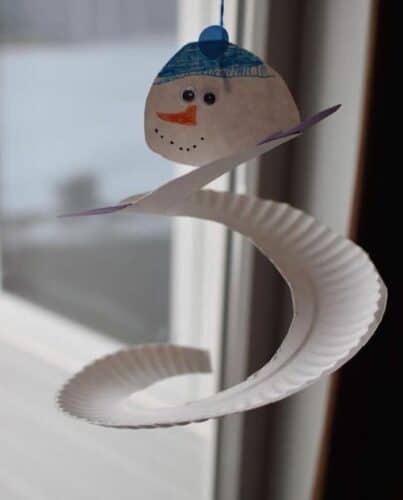
This paper plate snowman craft will have your kids mesmerized as it spins!
Flip a white paper plate face down. Use a pencil to start at the edge and draw a spiral toward the center. Once you reach the center, round it out for the snowman’s head. Using scissors, cut along the line. When you get to the center, round out the snowman head.
Glue a pair of googly eyes in the center. Draw the rest of the features and snowman accessories on with markers or crayons. You can also cut them from construction paper and add them! We love the idea of using pom-poms as buttons, too. Finally, cut a piece of yarn, loop it and tie it in a knot. Glue the knot to the back of the snowman’s hat. Let it dry completely before playing with it.
6. Snowman Cutout Mask
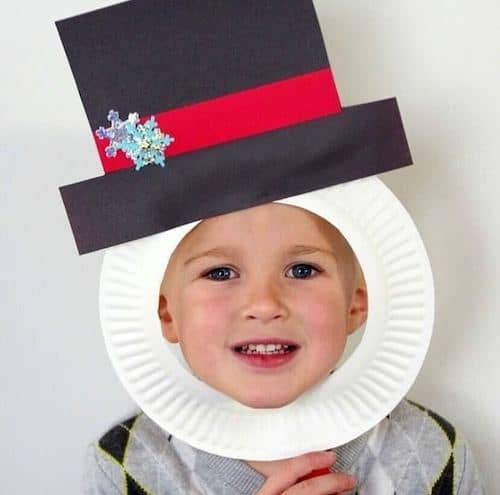
Some characters get all the attention around the holidays. But we think Frosty is worth celebrating all through the winter! This simple craft may not have a corncob pipe or a button nose, but it’s close enough.
Cut out the center circle of the paper plate. Then, use hot glue (adults only) to add a jumbo craft stick to the bottom of the paper plate. Cut out the shape of a snowman hat from black or colored card stock paper. Kids can either trace and cut the hat, or you can prepare this ahead of time (depending on their age).
Have kids decorate the hats. You can use simple red paper strips, snowflake stickers, Christmas ribbons, glitter, glitter glue, or anything you’d like. Once the hats are decorated, add the hat to the top of the paper plate using white glue or hot glue (adults only).
7. Egg Carton Snowman
This is another one of the ways you can use recycled materials to good use!
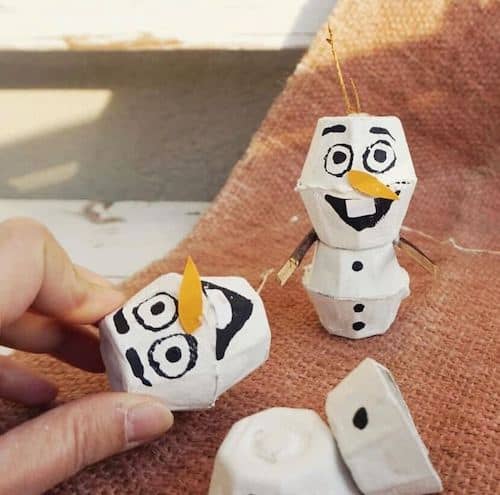
Note: this is for a “generic” snowman. See the “Olaf” variation at the bottom for the egg carton snowman craft in the photo.
Cut six egg carton cups down so that one edge is flat. For younger kids, parents will want to prep this part. Poke holes in the bottom of each egg carton. Thread your first carton onto a pipe cleaner and make a loose “knot” on the end. It doesn’t need to be tight; it just helps them from slipping off. Add another egg carton piece, forming a hollow ball. Kids can thread all six egg cartons on, alternating them facing up and down. Create a “knot” on the top of the pipe cleaners to hold it all in place. Cut off excess pipe cleaner or leave it longer if you want to hang them.
Using black craft paint, paint the top egg carton cup black. Paint the rest of the egg carton pieces white or cream using white craft paint. When dry, add a ribbon for the scarf and glue on google eyes and buttons if desired. Draw on a mouth with a Sharpie.
Olaf Egg Carton Craft
To make this adorable snowman character, use only four egg carton cups to make two snowman sections. Use paint for his features, including those distinctive eyebrows, front teeth, and buttons. Then, glue on an orange carrot nose made from construction paper. Finally, glue some tiny twigs as arms. Don’t forget to poke a few little twig sprouts through on top of his head.
8. Toilet Paper Roll Snowmen
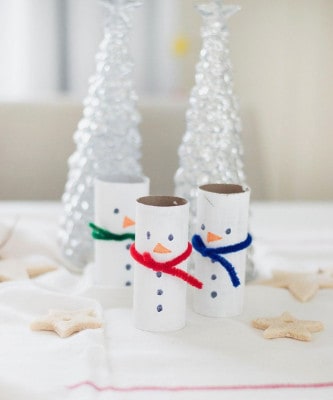
Empty toilet paper rolls have so many uses when it comes to crafts! Be sure to save them! We love this idea for toilet paper roll snowmen. If you have enough, your child can make and decorate a whole family of snowpeople!
Line your working surface with newspaper. Begin by painting the toilet paper roll with a coat of white paint. Allow it to dry completely. With the black marker, draw out two eyes and three buttons. Next, use an orange marker to draw out a carrot nose.
Between the nose and the buttons, wrap a pipe cleaner around the roll, tie a knot, then trim accordingly. Display your simple, cute snowman on your mantle, bookshelf, or anywhere you’d like!
9. Marshmallow Snowmen Treat
These cute snowman crafts will always be a hit with the kids. The best part about edible crafts is that you don’t have to find a spot to display the craft. It’s an activity and a snack treat!
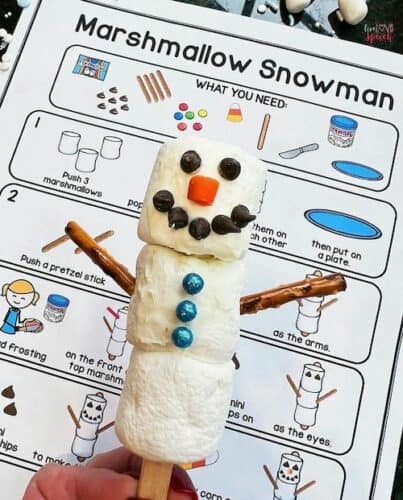
Using icing as glue, attach three large or jumbo marshmallows into a snowman shape and let dry. Alternatively, you could skewer the marshmallows onto a wooden craft stick. On the top marshmallow, paint the eyes and mouth with black food coloring and a toothpick. Any orange candy attached with icing works for the nose. We recommend an orange mini M&M or a sliced orange gumdrop.
Use a dab of icing to attach a chocolate chip, Rolo’s, or peppermint candy as a hat. Make pretzel stick arms and paste on the Red Hots as buttons (again, any round candy works). You can also use flat strip candy for a fashionable scarf. After admiring them for a few minutes, eat ’em (if you can make it past the construction phase).
It’s the Perfect Day to Make Some Snowman Crafts!
When you’re looking for snowman holiday decor or just fun ideas to make the winter season bright, we hope you found a craft idea you love! Crafts like these aren’t just great for some instant cheer. They also help practice kids’ fine motor skills and reduce screen time. Share your finished projects and snowman craft ideas on Instagram and tag us @getfamilyapp!
