15 Kids Spring Crafts That Everyone Will Love
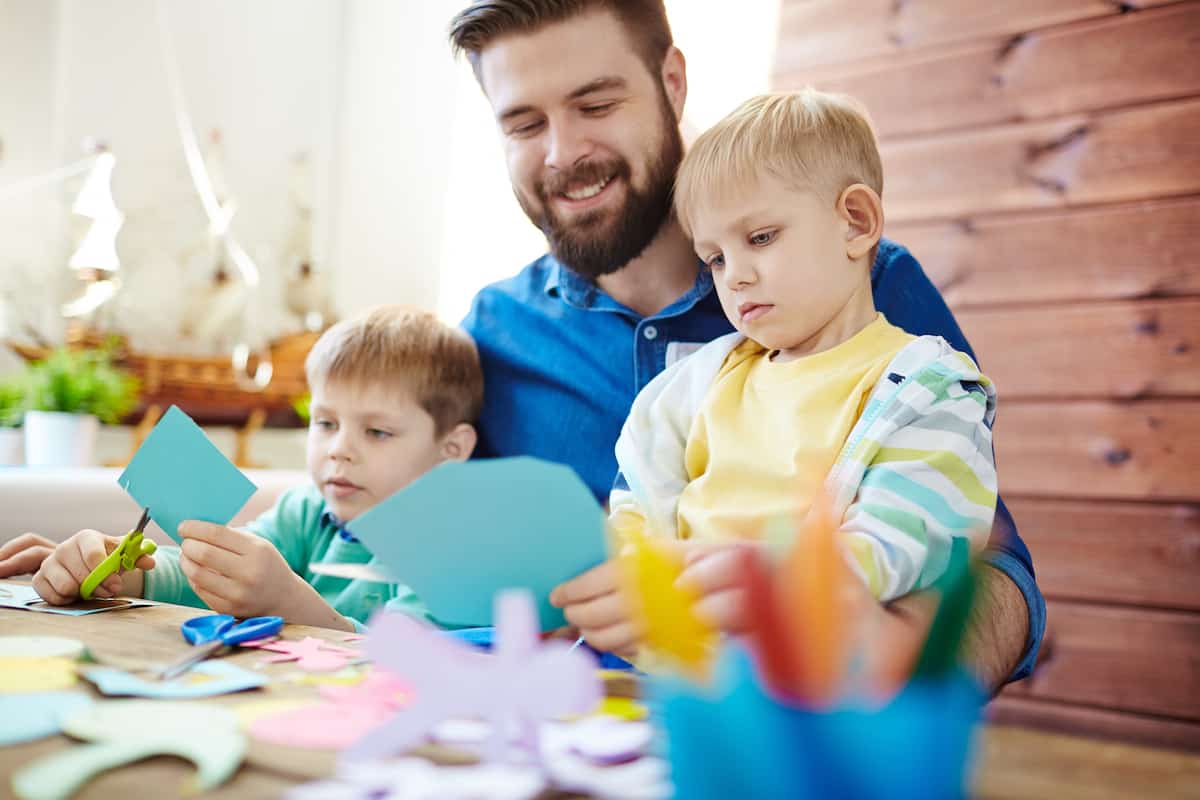
Looking for ways to keep the kiddos occupied and creative? We’ve got some ideas for kids’ spring crafts that may be just what you need!
*This article contains affiliate links. It doesn’t cost you anything, but if you click on the link and buy something, we’ll earn a small commission to help our writing team create more great articles.*
We Need Kids Spring Crafts Now More Than Ever!
It’s that time of year! The pollen is out, spring flowers start to blossom, Easter is just around the corner, and it looks like it’s the perfect time to get some easy spring crafts going with the kids. Fortunately, we’ve got some ideas for kids’ spring crafts that are easy, fun, and budget-friendly. If you are looking for an even more convenient craft option, Green Kid Crafts delivers science and art crafts for ages 2-10 right to your door!
Kids Spring Crafts for Toddlers and Preschoolers
These easy spring crafts are great to make with younger children, and you can recycle common household materials! You don’t have to stick with simple printables. Bring a little more texture into your craft time this spring!
1. Tissue Paper Collages
One of our favorite craft materials is tissue paper. It’s great for sensory play (who doesn’t love a good crinkle?), and it’s easy to tear and manipulate for little fingers. You can find it in just about any shade these days, and bright colors are great for the spring. Don’t forget, just a little glue goes a long way!
2. Caterpillar Cartons
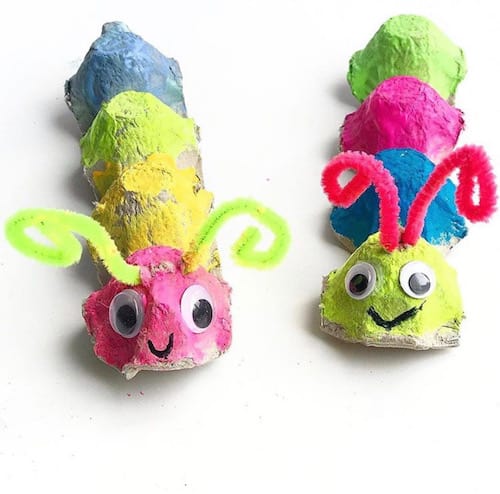
These colorful little caterpillars are adorable and made with recycled materials, too! All you need is a leftover egg carton, googly eyes, and some pipe cleaner! This one is really simple. Cut an empty, cardboard egg carton, so there are four or five sections, making sure they’re still connected. Cut off the excess edges. Have your child paint each section with acrylic paint. (Depending on the child’s age, you may want to take over from here). Once dry, have your child add some colorful pipe cleaner on top of the first section for some antennae. Glue on some googly eyes, and draw a mouth! You don’t just have to make a caterpillar! Egg cartons make a great base for all kinds of insect crafts like bumblebees, ants, and ladybugs!
3. Recycled Flower Power
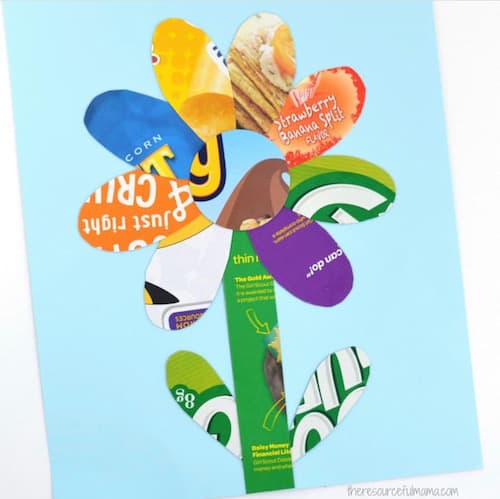
Good news! All you’ll need for this blossom is one is a quick trip to the recycle bin! Grab some clean, dry cardboard from cereal or other food items, magazines, or newspapers. Cut them into petals leaves, a long, skinny rectangle for the stem, and a circle for the center. This would be a great way to talk about all the different parts of the flower or a lesson on how recycling materials is good for the earth! Glue all the pieces onto a bright piece of paper.
4. Cupcake Liner Butterflies
Have your child decorate two white or single-colored cupcake liners with markers, crayons, or paint to create a lovely butterfly. If you don’t have cupcake liners, your coffee filters could work, too (If they’re little guys, you may want to take over from here). Once dry, open up the cupcake liners and fold them in half. Then, fold them again. Glue them together, so it looks like a bow tie. Clip the clothespin over the cupcake liners and add a bit of glue on top. Sprinkle on some glitter, and you could even add some string for the antennae.
5. Binoculars
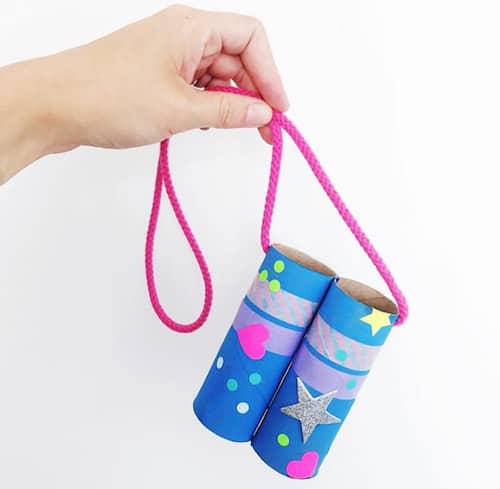
Tape two cardboard tubes together. Either an empty toilet paper roll or a paper towel roll cut in half should work. Then, decorate them with stickers, paint, or whatever you have lying around the house! After it’s dry, attach a string or cord to the outer rim with strong, clear tape. Use your binoculars to spy things in nature through the window, or go outside on a nature walk and make a list of things to look for.
6. Handprint Crafts
The great thing about handprints is they add such a personal touch to any craft. Have your child paint their hand and use the print as flowers by adding little green stems!
Add a string/yarn tail, and their handprint can be a kite. Talk about how wind keeps kites in the air, and then go fly a kite together!
To make a sunshine, have your child paint their hand yellow and pivot around one point to make a sun! The fingers make little rays of sunshine. Talk about how the sun heats the earth and makes all the plants and flowers grow in the spring.
During this time, when many of us are stuck in the house, you could send your child’s handprint art to a relative or family friend who you have not seen in a while. You could even use it as a nice Easter card. If you want to be extra cautious, especially if the recipient is elderly, slide it in a sheet protector and seal it up before sending it. It’s sure to brighten their day!
Kids Spring Crafts for Pre-K and Older
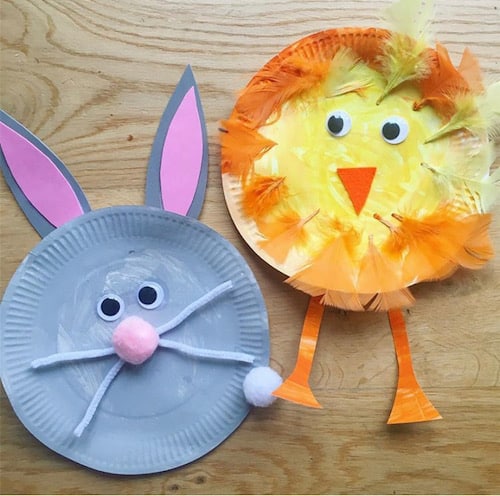
Nothing says spring like little chicks and bunnies (and I’m not talking about the marshmallow kind). For both variations, you’ll need a paper plate, googly eyes, and glue.
7. Bunny Craft
For the bunny plate, you’ll need gray paint, two large pom-poms (the picture shows white and pink, but use what you have), two or three white pipe cleaners (whiskers), and pink and gray paper or foam sheets cut into bunny ear shapes. The gray should be about half an inch larger than the pink.
Once the paper plate is painted and dry, glue the two sections of the ears together, then attach it to the top of the paper plate. Attach the whiskers to the center of the plate, making sure they’re secured with enough glue. Attach the pom-pom nose at the cross-section of the whiskers. Then, glue some googly eyes above the nose and a pom-pom tail on the bottom corner!
8. Coffee Filter Butterflies
You’ll need coffee filters, popsicle sticks, liquid glue, glitter, a hot glue gun, pipe cleaner, craft scissors, watercolors, paintbrushes, and a paper plate to contain the mess. Put the coffee filter onto the paper plate and paint the coffee filter using the watercolors/paintbrush. Set them aside to dry. Now it’s time to decorate the popsicle stick! Spread the liquid glue with a paintbrush onto the popsicle stick and decorate with glitter. Be sure to work on top of a paper plate to cut down on the mess. Once the coffee filter has dried, fold it in half and use the craft scissors to make butterfly wings. Then, trim the pipe cleaner to make antennae. Next, use the hot glue gun (THIS IS A STEP FOR ADULTS) to glue the wings to the underside of the popsicle stick. Finally, glue the antennae to the top.
9. Baby Chick Craft
For the chick, you’ll need yellow paint, yellow and orange feathers, an orange paper triangle (for the beak), and two orange paper legs.
Once the paper plate has finished drying, attach feathers all around the outer rim of the paper plate. Glue the legs on the bottom. Attach the googly eyes and upside-down triangle nose below them!
With kids, it’s all about creativity and initiative. If they want to do all the gluing, make sure they’re old enough and well supervised. If they want to make the beak upside down or attach a leg on top of the head, that’s all part of the beauty of childhood art. It’s okay to break the rules. Sometimes, it makes the whole thing more comical, and I often find that I love the end result even more.
10. Paper Plate Flower Craft
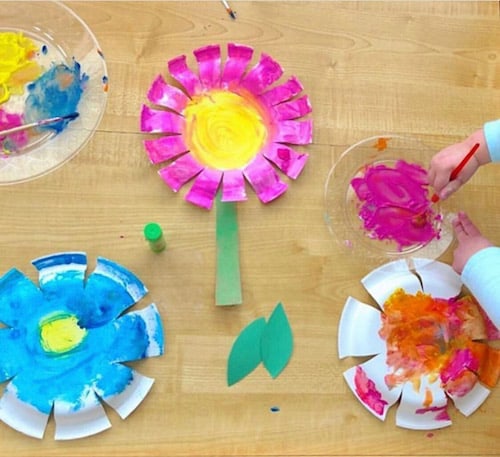
Grab a paper plate and cut slots along the edges to make the look of flower petals. Decorate each flower however you want with watercolor or acrylic washable paint. Add an optional thick strip of cardboard covered in green paper for the stem, complete with green construction paper leaves! Place them in a vase or basket to complete the look!
11. DIY Bird Feeder
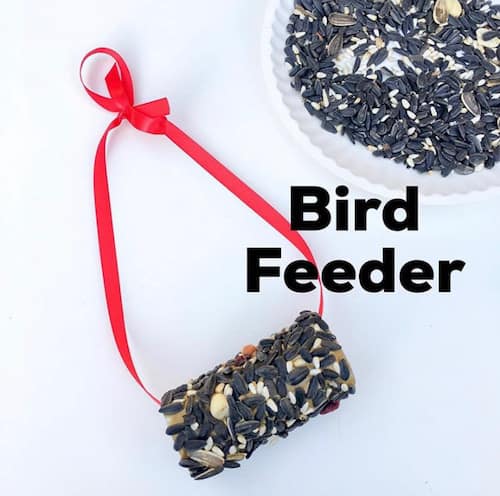
With spring just around the corner, all the birds chirping are one of my favorite changes. A DIY bird-feeder is the perfect way to get your kids interested in nature. Talk with your little one about how animals’ habits change in the spring with the warmer weather. They’ve got to start nest building and looking for food to feed their new baby birds!
All you’ll need is an empty toilet paper roll or paper towel roll, some peanut butter (or any nut butter), and some birdseed. Spread the peanut butter onto the cardboard roll. Roll in the birdseed and coat completely. Tie ribbon or yarn through the center of the feeder, then place near a window so you can watch! You can even encourage your child to start a bird journal and identify which birds and other critters visit the feeder each day.
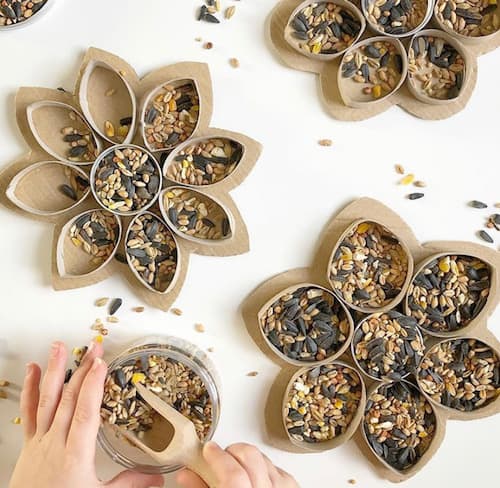
All you’ll need is an empty toilet paper roll or paper towel roll, some peanut butter (or any nut butter), and some birdseed. Spread the peanut butter onto the cardboard roll. Roll in the birdseed and coat completely. Tie ribbon or yarn through the center of the feeder, then place near a window so you can watch! You can even encourage your child to start a bird journal and identify which birds and other critters visit the feeder each day.
12. DIY Rainbow Suncatcher
All you’ll need is clear contact paper, tissue paper scraps, and black and white construction paper. Cut an upside-down “u” shape out of the black paper for the rainbow outline and attach it to the sticky side of the contact paper. Then, fill in the middle with lines of each color of tissue paper. Cut out some puffy clouds from the white paper and add to the bottom with glue. Attach a string and hang from a window with lots of sunlight to see the colors shine through your beautiful suncatcher! It’s a great way to talk about R-O-Y-G-B-I-V and how each color is represented in the rainbow.
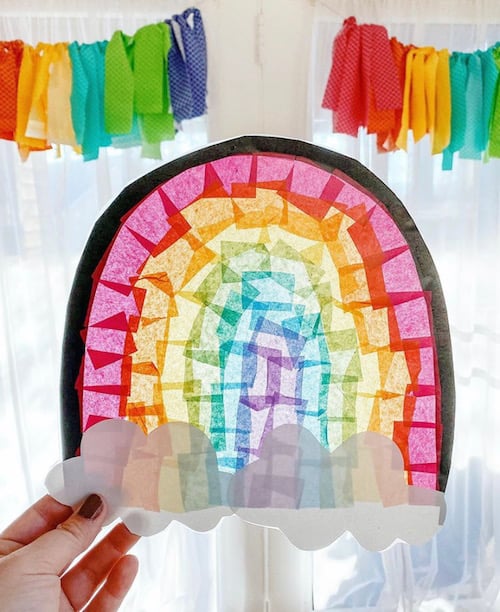
Idea and photo by @tantrumsandrainbows
13. Spring Wreath
Wreaths make a great decoration for the front door and make anyone feel welcome. For the base, you can use a simple paper plate or a foam or wire base from a craft store. Fill your wreath with the coffee filter butterfly craft (from above) or flowers made from tissue paper or craft paper.
15. Learn All About Photosynthesis
Use an old egg carton to plant seeds and watch them grow! Place on a windowsill where it can get plenty of light and help your child use a watering can to make sure it gets enough moisture. As the seedlings sprout, talk about all the different stages of plant life and growth. Note how they change every day, and encourage them to take photos or draw pictures at each stage so they can watch the progress. Once one of the sprouts have grown large enough, transfer one to a terra cotta pot that your kiddo can decorate or paint themselves. Then, put it in the garden and watch as it grows!
Making the Most of Kids Spring Crafts
A spring craft may just be what you and the kiddos need to bring a little creativity and joy to the day. Don’t sweat it. It may work, it may not go as planned. It’s worth a shot! Keep up the good work, parents! You’re doing great!
What are some of your favorite spring craft ideas? Let us know in the comments or tag us on Instagram @getfamilyapp!
